
Quilting
Quilt Pictures: Three Layouts and What to Look For
The short answer
Look at the full quilt for its layout, then study close views for seams and stitching. Follow a complete pattern when you are ready to sew.
Last updated October 2026
What's covered7
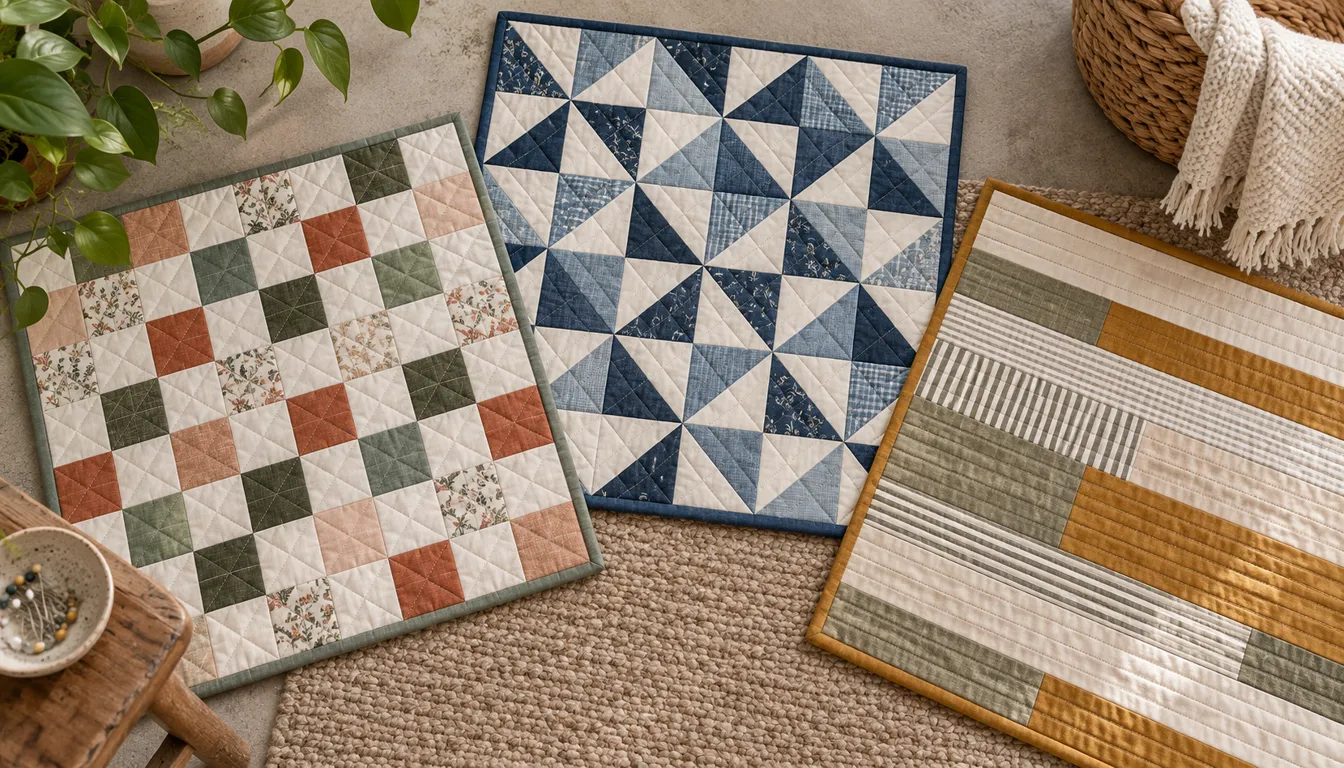
Quilt pictures can help you choose a layout when you compare the full view with close views. Look for repeated patches and light-dark areas first, then study the seams, stitches and edge. Use those details to find a pattern with instructions you can follow.
Compare the checkerboard, bars and framed center below to see which layout suits your fabric, then check its cut sizes against the finished measurements. Use the quilting guide to plan materials and yardage. Before choosing stitched lines for the top, compare piecing and quilting designs in the pattern-and-quilting guide.
Quilt pictures: read the large shapes first
Step back from a picture and notice its largest light and dark areas. A quilt with many small pieces may still be built around a simple checkerboard, stripe or diamond. That larger structure often explains why the design looks clear.
Next, look for a repeated unit. Count how many times it appears across and down. A large square may be one piece of fabric or a block made from smaller pieces, so inspect a close view before deciding.
Finally, look for the quilting line. It may follow the patch seams or cross them in a separate pattern. Shadows from stitching can create shapes that are not part of the piecing.
The Robert Kaufman free quilt and project library is a publisher source where you can move from a project image to its own instructions. Follow those instructions as a complete set rather than measuring the image on screen.
Picture one: a two-color checkerboard
The first study uses six columns and six rows of equal squares. Alternate light and dark across a row, then reverse the order for the next row. The repeat is a simple two-color contrast.
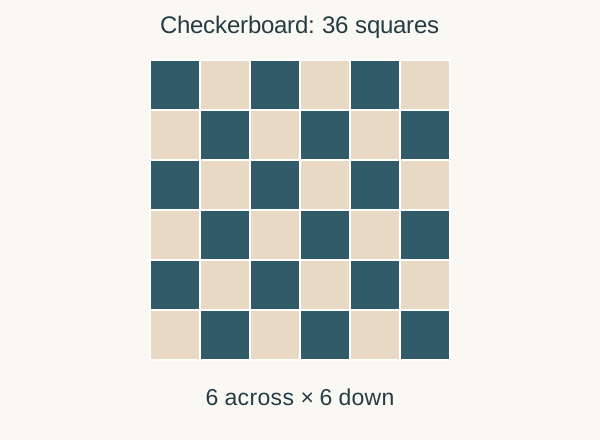
With 4-inch finished squares, the layout makes a 24-inch-square top: 6 × 4 = 24 in both directions. Cut 36 squares at 4 1/2 inches for 1/4-inch seams. Use 18 squares of each color.
In a photo, this design can look calm with two solids or busy with many prints. The structure remains the same if every print stays clearly inside its light or dark group. The scrap quilt design guide explains that lightness sorting.
Picture two: wide vertical bars
The second study uses five long rectangles. Alternating two colors gives three bars of one color and two of the other. There are fewer intersections than in a square grid, so the fabric itself becomes a larger part of the picture.
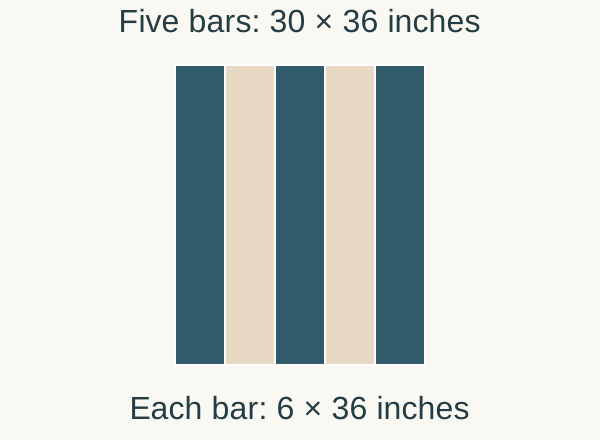
For a 30-by-36-inch top, let each bar finish at 6 by 36 inches. Cut five rectangles 6 1/2 by 36 1/2 inches for 1/4-inch seams. The five finished widths total 30 inches.
Look for directional prints before sewing long bars. A motif can remain upright in a vertical layout but turn sideways if you rotate the whole design. Take a photo of the intended arrangement and mark the top edge of each strip.
Picture three: a framed center
The third study places one large square inside a plain border. The frame directs attention to a panel, special print or small pieced center. Its simplicity makes uneven border widths easy to notice.
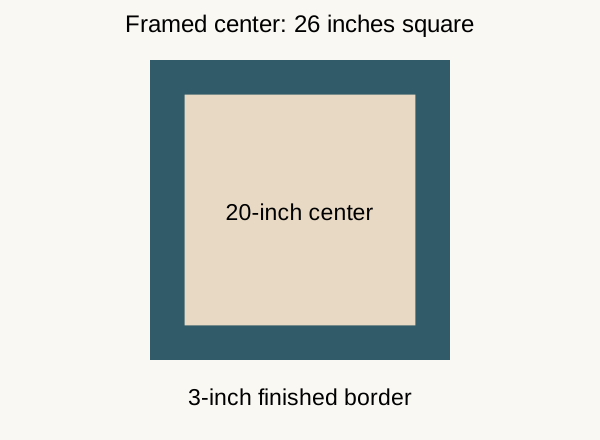
To make this framed layout, start with a center that finishes at 20 inches square. A 3-inch finished border on each side gives an overall size of 20 + 3 + 3 = 26 inches. Before adding borders, the center should measure 20 1/2 inches square.
Cut two side borders 3 1/2 by 20 1/2 inches. After attaching them, the top measures 26 1/2 inches across. Cut the upper and lower borders 3 1/2 by 26 1/2 inches. These sizes assume the center was sewn to the planned size; measure it before cutting.
Use a gallery to find a method, not an unseen pattern
A photo cannot show every sewing step. One star pattern may join diamonds, while another uses triangle units or appliqué. Find the full pattern to see which techniques you will need to sew it.
When a design appeals to you, find the maker or publisher's page. Look for the finished size, cutting list, seam allowance and assembly method. Check whether the image represents the exact pattern version you are reading.
Museum collections can help you study historical quilts, but an image record is not a sewing pattern. Read the collection's description and image-use terms. Keep the maker's attribution with any research records you save.
For a first project based on equal shapes, use our beginner quilt. For triangle rotations, compare half-square triangle layouts. Each gives a method that a picture alone cannot supply.
Take a photo of your own quilt clearly
Take one full view with the quilt flat and the camera facing it as squarely as possible. Keep the whole perimeter inside the frame. A quilt draped over a chair shows texture but hides parts of the layout.
Add a close view of a block, a quilting area and a bound corner. Soft side light can show the stitched texture. Check that the colors look close to the actual fabrics before using the photo as a project record.
Use a plain background where possible. Strong patterns behind the quilt make its outline harder to read. Keep tools out of the full layout photo unless they explain a sewing stage you are recording.
Write the finished sizes beside your project photos rather than placing a ruler across every picture. Add the pattern source, fabric choices and any steps you did differently. These details make the photos more useful when you sew another quilt.
Before saving a reference image, write down the feature you want to learn: the color contrast, block repeat or stitched texture. That short record helps you choose a suitable lesson instead of starting from an attractive picture with no sewing plan.
Verdict on quilt pictures
Quilt pictures help you choose a visual structure when you separate patchwork, color and quilting. Compare a full view with details, then use a complete pattern for sewing. Your own clear photos can become a practical record of what you made and how it worked.
FAQ
Can I make a quilt pattern from a photo alone?
A picture can help you choose colors and patch outlines, but it may hide the assembly method and seam allowances. Find the maker or publisher's complete instructions before cutting. Similar-looking stars or frames can use very different sewing methods.
What photos should I take of my own quilt?
Take a full flat view that includes the entire edge, then details of a block, quilting and binding corner. Keep the camera square to the quilt where possible. Save final sizes and care records beside those images.
Why does a quilt look different in a close-up?
A close view emphasizes prints, seams and thread. A full view shows the larger lightness pattern and repeated units. Compare both before choosing a project so the sewing details and overall design suit the result you want.