
Sewing Projects
Patchwork Heart Pillow: Layout, Pressing and an Envelope Back
The short answer
Choose the pillow insert first. An eight-by-eight grid of 2-inch finished squares makes a 16-inch front; two overlapping back panels close it without a zipper.
Last updated October 2026
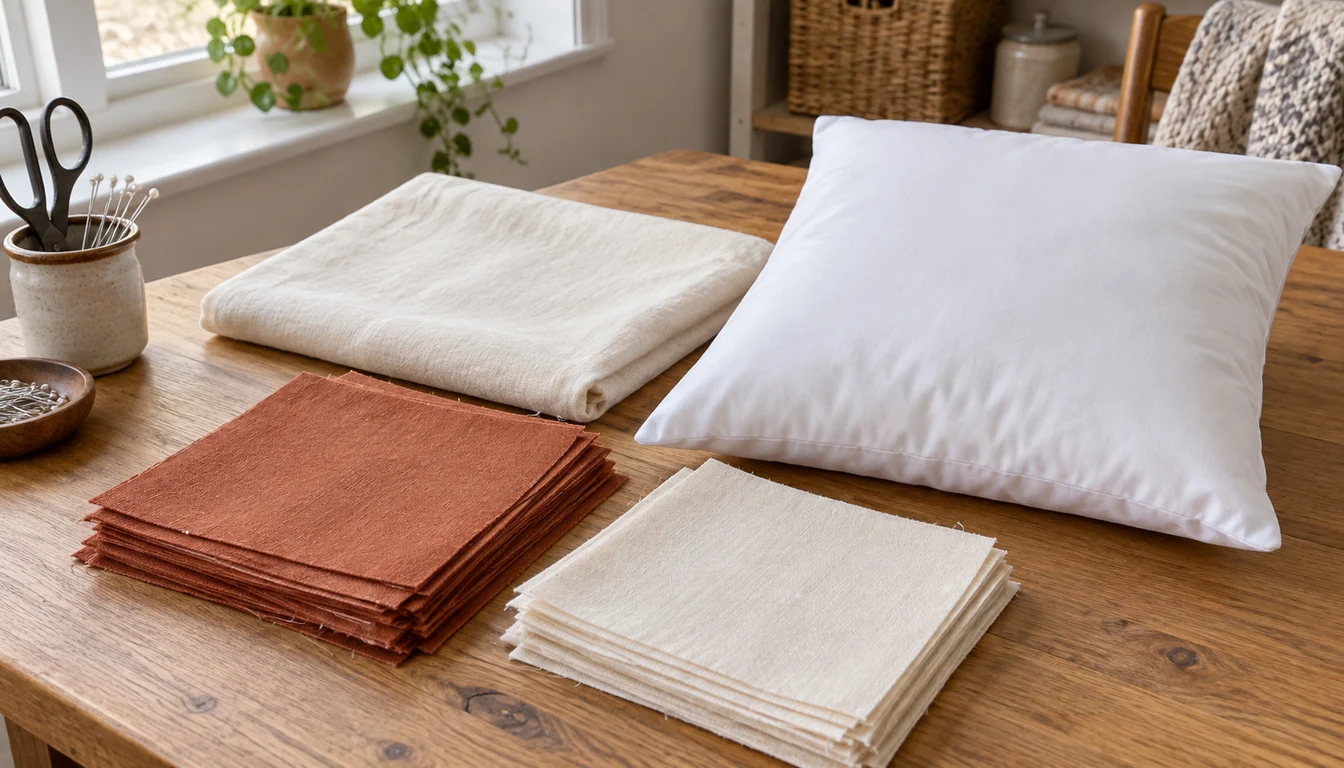
What's covered6
A patchwork pillow is small enough to lay out on a table, but it still teaches accurate seams. This version uses only whole squares for the heart. You can change the colors without changing the construction.
Choose a heart color that stands out against the background. Cotton solids make the outline easy to see; small prints can add variety within the same layout. An envelope back closes the cover with overlapping fabric panels, so you can remove the insert for washing.
Measure the insert and choose the cover size
Read the insert label, then measure it. The example here aims for a 16-inch square cover measured between the outer seams. Inserts vary in fullness, so the number on the package alone does not promise a particular fit.
If the insert needs a different cover size, alter the square size or add a border before cutting the back. For an eight-square row, divide the desired finished front width by eight. Add ½ inch to that figure for the cut square when sewing ¼-inch seams.
Make a plain scrap cover if you are unsure how tightly your insert should fit. It is easier to change that than a finished patchwork front. The SINGER envelope pillowcase guide also starts by measuring an existing pillow and allowing for hems and the folded closure. The separate-panel example below uses different construction and measurements.
Cutting list for the 16-inch example
Use stable woven cotton for the front and back. You need a sewing machine, thread, ruler, scissors or rotary cutter and mat, pins, a removable marking tool and an iron. Read the care instructions for all the fabrics and prepare them consistently before cutting.
| Piece | Cut size | Number |
|---|---|---|
| Heart-color squares | 2½ by 2½ inches | 32 |
| Background squares | 2½ by 2½ inches | 32 |
| Back panels | 16½ by 11 inches | 2 |
Scroll for more →
The front measures 16½ inches square before its outer seam is sewn. Each back panel loses 1 inch at its opening hem. With the raw outer edges aligned to the front, the two hemmed panels overlap by 3½ inches. These figures assume no front quilting that changes its size.
If you add a quilted layer behind the front, quilt it first, then square and measure it. Recalculate the backing from that measurement instead of forcing a smaller front onto the original back panels.
Arrange the original square heart
Use the diagram as a row map. A colored square is part of the heart; a pale square is background. The first and last rows are all background. The two upper lobes sit above a wide center, then taper to a two-square point.
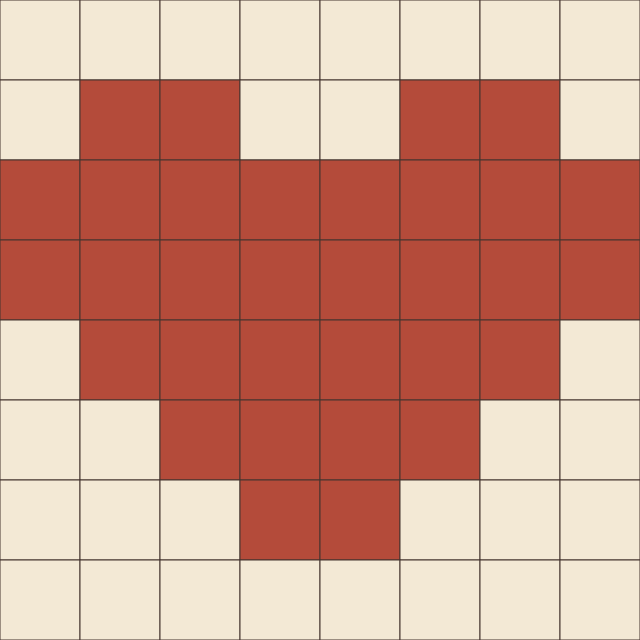
Count 32 heart squares and 32 background squares on your table. If you use several prints in the heart, move them around until the heart stands out from the background. A very busy background can hide its outline. Photograph your layout and keep the row order visible.
For a quilt version with sloping edges, use the separate half-square triangle heart layout. Do not substitute triangle units into this cutting list without adjusting their construction and counts.
Sew the front one row at a time
- Join the first two squares in a row with right sides together and a ¼-inch seam. Continue across the row, keeping the original order.
- Check its width before joining the next row. Eight 2½-inch cut squares lose 3½ inches through seven joins, so the row should measure 16½ inches.
- Press the seam allowances in one direction. Press the next row in the other direction if you want the allowances to nest at the joins.
- Place two rows right sides together. Match the seam intersections and pin where useful. Remove pins before the needle reaches them.
- Join the rows, then check the front's shape before adding more. Press without dragging the rows sideways.
BERNINA's basic piecing ebook explains piecing seam guides. Check a sewn sample on your own machine rather than assuming that a foot marking produces the exact allowance.
Choose a needle that suits the cotton and thread using our cotton needle choices. If you need a machine, the small cotton-project machine comparison covers useful controls for learning straight seams.
Hem the envelope back
On one 16½-inch edge of each back panel, turn ½ inch to the wrong side and press. Turn another ½ inch, press again, and stitch near the inner fold. Each opening edge now has its raw edge enclosed.
Lay the front right side up. Put the first back panel right side down, matching its raw outer edge to the top of the front. Put the second panel right side down, matching its raw outer edge to the bottom. Their hemmed edges overlap across the middle. Check that every layer's right side faces inward.
Pin around the perimeter, keeping the hems flat. Sew the outer edge with a ¼-inch seam, securing the start and finish. Finish the raw allowances with an appropriate zigzag or other finish from your machine's manual. Trim the corners carefully without cutting the stitches, then turn the cover through the opening.
Check the finished cover
Ease out the corners with a blunt tool, press, and insert the pillow. If the opening gapes, check the overlap and insert fullness. If the cover twists, look for an uneven perimeter seam or a front that was not square before assembly.
A tight fit is not fixed by pulling harder on the patchwork. Make a more generous back or adjust the front size on the next cover. Keep the fabric care information with a gifted cover, and remove the insert before washing if its label requires that.
For a small gift, use the sewing swap checklist to confirm the recipient's insert size and color preferences. Our beginner supplies checklist can help you check the tools already on hand before starting.