
Quilting
Quilt Patterns: Choose a Layout You Can Finish
The short answer
Choose a pattern by its hardest seam, largest patch and finished size. Make one sample before cutting the whole top.
Last updated October 2026
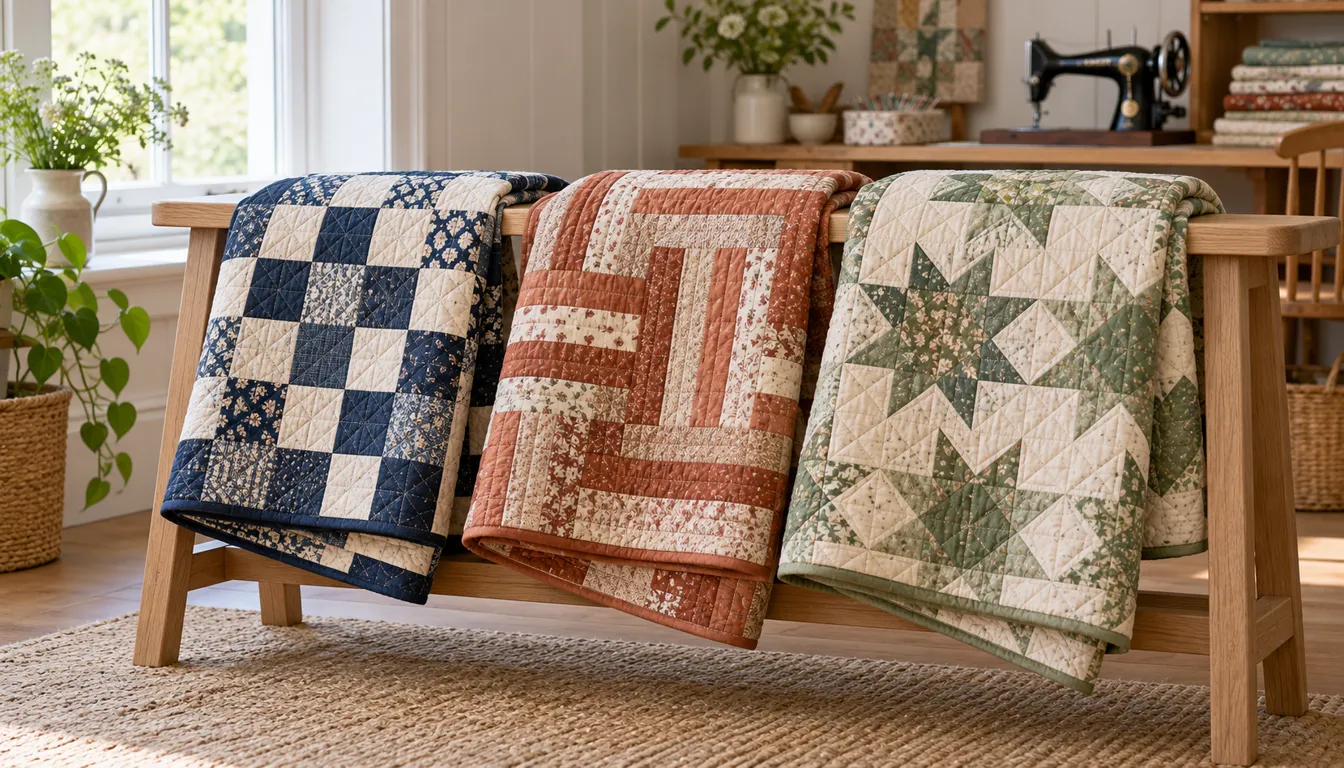
What's covered7
Quilt patterns turn fabric into a plan: a finished size, a cutting list and an order for joining the pieces. Choose by the seams you can sew and the fabric you want to show. A square grid or strip layout gives a new quilter a clear place to start.
Start with the finished quilt size, then check the largest block and the hardest seam. Look for a complete cutting list, clear diagrams and separate finishing needs. Use a layout with wide pieces when the print matters. Choose smaller repeated units when shapes and color changes are the main feature. Sew one sample before cutting a whole quilt.
Choose quilt designs by the job they do
A quilt for a sofa needs a different plan from a small wall hanging. Measure the place where it will go. For a bed, decide how far the sides should hang. Your measured target is more useful than a size name on a pattern cover.
Use our quilting guide to plan the fabric and finishing supplies with the pattern. Then sort the designs by how they use cloth. Large squares preserve big flowers or picture prints. Narrow strips break those prints into smaller pieces. Strong light and dark changes can make a plain block read from across a room.
| Pattern family | What you sew | Choose it when |
|---|---|---|
| Whole-square grid | Squares in straight rows | You want to keep prints whole |
| Strip layout | Long seams and crosscuts | Repeated color bands are the goal |
| Triangle blocks | Trimmed two-color units | You want stars or diagonal shapes |
| Panel setting | Frames around a printed center | The center image should lead |
Scroll for more →
When you look at a pattern photo, notice whether the fabric print or the block shapes stand out first. Pick wider patches if you like the fabric print. If the repeated blocks stand out more, use contrasting fabrics so their outlines stay clear.
Read quilt patterns before buying fabric
Check the finished dimensions, seam allowance and cutting terms first. The example below uses 1/4-inch seams throughout. A plain square cut at 6 1/2 inches finishes at 6 inches once its outer edges enter seams. The two allowances together use 1/2 inch.
Some patterns give unfinished unit sizes during assembly. Others state the final block size on the cover. Circle those words on your working copy. A block that measures 12 1/2 inches on the table can be correct for a 12-inch finished block.
Read through the last step too. A list of fabric for the top may leave backing, batting and binding for a separate list. Mark each material as top, back, middle layer or edge finish so you do not spend the backing fabric on extra blocks.
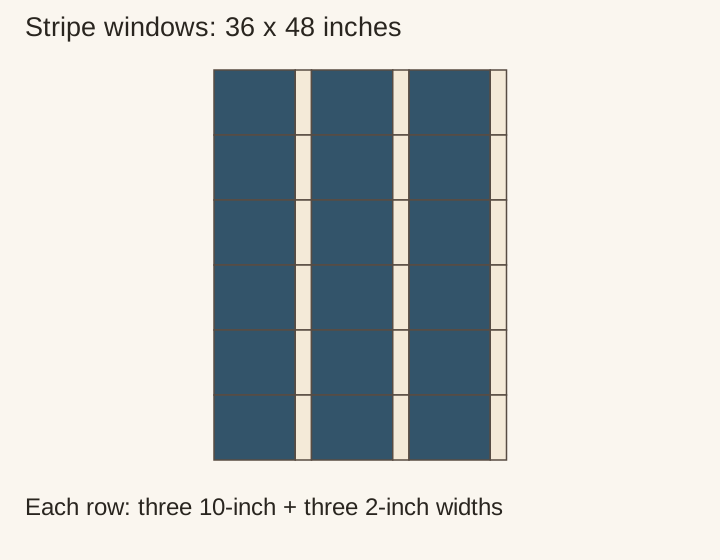
Stripe-window quilt top: 36 by 48 inches
This layout uses large printed rectangles between narrow plain strips. It keeps a busy print readable while giving you short, repeated seams. The finished top has six identical rows. Each row finishes at 36 inches wide and 8 inches high.
Cut these pieces for the top:
| Piece | Cut size | Count |
|---|---|---|
| Printed window | 10 1/2 by 8 1/2 inches | 18 |
| Plain divider | 2 1/2 by 8 1/2 inches | 18 |
Scroll for more →
Each row is window, divider, window, divider, window, divider. Its finished width is 10 + 2 + 10 + 2 + 10 + 2 = 36 inches. Six rows give 6 x 8 = 48 inches in height. Align all six rows with a printed window on the left and a plain divider on the right.
For a cutting estimate, assume your measured usable width is 42 inches. A strip 8 1/2 inches in length yields four printed windows across, since 4 x 10 1/2 = 42. Five such strips give 20 windows and use 42 1/2 inches of length. That is 42.5 / 36 = about 1.18 yards before any extra for squaring or shrinkage.
The dividers fit 16 across that same width, using 16 x 2 1/2 = 40 inches. Two 8 1/2-inch strips give 32 dividers and use 17 inches of length. Measure your actual cloth first. A width below 42 inches changes the printed-window yield.
Sew a sample row and check its length
Arrange one row on the table before sewing. Keep any one-way prints upright. Join the first window to its divider, then repeat for the other two pairs. Join the pairs in the same order. The row should measure 36 1/2 by 8 1/2 inches before it enters the top.
If it is short, measure a window and a divider after sewing. Look for a cutting error or a seam wider than 1/4 inch. Solve that on the sample. Cutting five more rows from the same wrong setup repeats the loss.
Sew the remaining rows, keeping the plain divider at the same end. Join the rows from top to bottom. The assembled top should measure 36 1/2 by 48 1/2 inches with its outer seam allowances still present. Lay it flat and check both side lengths before adding any border.
Adjust the look without changing the cutting plan
A quiet background makes each window stand out. A dark divider gives a stronger stripe. You can sort the windows by color to make each row distinct, or spread the colors through all six rows. Keep the piece count the same while you test the layout.
Take a quick photo before stacking the rows. For help judging a layout from a distance, use the quilt pictures guide. Write row numbers on removable paper labels so the order survives a move from table to machine.
If large rectangles feel too plain, the star pattern guide gives you a next step with angles. For the lowest seam count, compare simple quilt patterns. Each layout has its own cutting plan, so use its measurements throughout the project.
Choose quilt patterns you can follow
Open a sample instruction page when the publisher offers one. Look for a clear piece label system and diagrams that show which edges meet. Check whether special templates or a cutting system are part of the method. A free download can still need tools you do not own.
The Moda free-pattern library is one place to browse publisher projects. Follow the selected pattern's own requirements from start to finish. Our free quilt patterns guide explains how to check a download before committing fabric.
If you are choosing a first machine as well, compare beginner quilting machines after you know the project size. The top can be built in small pieces, while quilting the layers asks for space to hold the full quilt.
Verdict
Choose quilt patterns whose hardest step you can practice on a scrap sample today. Match the cloth to the patch size, check the cutting yield on your real fabric width, and finish a small top before scaling it up.
FAQ
What should a quilt pattern include?
Look for finished size, fabric needs, cut sizes, seam allowance and assembly order. Backing, batting and binding may have their own list.
Can I adjust the colors in a quilt design?
Yes. Keep enough light and dark contrast to show the shapes. Lay out a sample block before replacing every fabric in a published plan.
How do I make a quilt pattern larger?
Add complete rows or columns and calculate the finished size again. Recount every piece and the backing and binding needs rather than scaling the printed cut sizes.