
Quilting
Hand Quilting: Start with a Running-Stitch Sample
The short answer
Start with a small sample and a stitch size you can repeat. Catch all three layers and keep the thread snug without gathering the fabric.
Last updated October 2026
What's covered8
- Hand quilting for beginners: make a useful sample
- Match the needle and thread
- Choose a line plan the batting needs
- Hold the layers with a hoop, frame or table
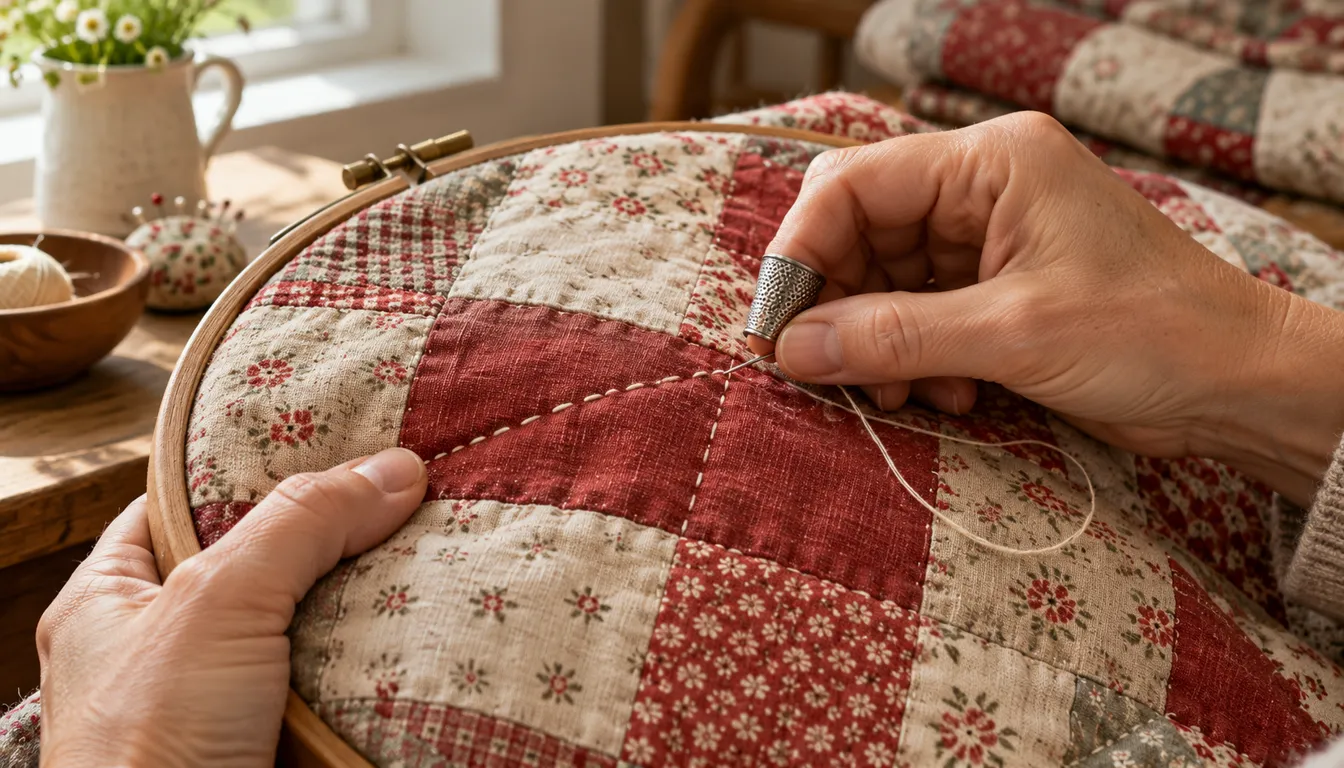
- Sew a running stitch through the sandwich
- Keep the rhythm even instead of chasing tiny stitches
- Finish the thread and the quilt edge
- Verdict on hand quilting
Hand quilting uses a needle and running stitches to hold the quilt top, batting and backing together. Start with a small basted sandwich and a simple line plan. Make stitches that catch all three layers and lie evenly, then build speed after the movement feels comfortable.
Hand quilting can be the finishing method for a machine-pieced top. It does not require you to sew every patch by hand. The quilting guide shows the full sequence; this page focuses on stitching the layered quilt.
Hand quilting for beginners: make a useful sample
Choose scraps from the project fabrics and the batting you plan to use. A sample with different filling may feel easier or harder than the real quilt, so match the layers as closely as possible.
For this exercise, cut a 14-inch square of top fabric and 16-inch squares of batting and backing. Centering the top leaves 1 inch of extra batting and backing on each side: (16 − 14) ÷ 2 = 1. These are practice dimensions, not a finished quilt size.
Baste the layers so they stay together while you stitch. Check the back for folds. Mark a few straight lines with a marking method tested on the same fabric, then stitch only part of the sample before inspecting it.
Save the sample as a handling test. The goal is to find a needle, thread and holding method that let you pass through the layers without a hard pull. A neat short line is more useful than a full sample sewn with strained hands.
Match the needle and thread
Traditional small quilting stitches use a different needle-and-thread combination from bold decorative stitches. Choose a needle whose eye accepts the thread comfortably and whose shaft passes through the layered sample without excessive force.
Clover's quilting-between hand needles are made for hand quilting. Read the intended use on the needle packet rather than selecting by the size number alone. A number used for one needle family may mean something different in another.
A thimble can help guide and push the needle. Try its fit on the practice piece before a long session. You should still be able to control the needle rather than pressing harder to overcome a poor match of tools and layers.
Thread color changes the look of the quilting. A matching thread makes the texture more noticeable than the line itself. A contrasting thread makes each stitch visible, including changes in spacing. Test both effects on scraps before deciding.
Choose a line plan the batting needs
Read the batting maker's quilting-distance instructions. That limit tells you how far apart the holding stitches may be. It is separate from stitch length along a line.
For example, the Warm Company page for Warm & Natural permits quilting or tying up to 10 inches apart. That figure belongs to that specific batting. Check the packaging for the filling in your quilt instead of applying it to every cotton or blend product.
On the 14-inch practice top, mark parallel lines at 2-inch intervals starting 1 inch from an edge. The positions are 1, 3, 5, 7, 9, 11 and 13 inches, giving seven lines. Use these lines to practice even stitches, and check that this spacing meets your batting's instructions.
If you add a second set of perpendicular lines, you get a crosshatch. Stitch one direction first and inspect the result before adding the other. A simple plan leaves your attention free for the stitch itself.
Hold the layers with a hoop, frame or table
A quilting hoop or frame can hold a working area, while a small piece can be supported on a table or lap. Use equipment intended to handle quilt layers and follow its directions. The sandwich should remain easy to stitch through.
Keep the rest of the quilt supported instead of letting it hang from the hoop or your stitching hand. Reposition the work when you reach beyond a comfortable area. Do not keep sewing farther away just to finish a line in one sitting.
Check both faces when moving the hoop or frame. Basting holds the layers temporarily, but a fold can still develop if the sandwich is pulled unevenly. Smooth the next area before tightening a hoop or beginning another line.
The size of the project changes the handling more than the basic stitch. Start with a small quilt or wall piece before a bed-size top. You can build the same running-stitch skill without holding a heavy bundle.
Sew a running stitch through the sandwich
Secure the thread using the starting method you have practiced on the sample. If you bury a small knot inside the layers, test that it stays put when you pull the thread snug. A knot that slips through the top fabric will not hold the first stitch.
Bring the needle through all three layers for each quilting stitch. Begin with one stitch at a time if that gives better control. Keep the thread snug enough to lie against the fabric without pulling the fabric into gathers.
After a short length, look at the back. The stitches should be present there as well as on the front. If some bites miss the backing, slow down and adjust the needle angle before continuing.
As control improves, you may take several small bites before pulling the thread through. Do not make loading many stitches the first goal. Even tension and complete layer catches are more useful than a crowded needle.
Keep the rhythm even instead of chasing tiny stitches
Choose a stitch size you can repeat. If a seam intersection feels thick, take one stitch at a time there. Forcing the same loaded-needle motion through a bulky join can bend the path or strain the thread.
Keep the working thread short enough to handle without repeated tangles. Replace a frayed length rather than pulling it through the whole quilt. If tangling continues, check the needle eye and how tightly you are holding the thread.
Pause to look at the whole sample from a comfortable viewing distance. Slightly uneven stitch lengths may be hard to see once you step back. Fix any puckered line or backing tuck before moving on so the sample stays flat.
If you prefer faster lines with machine feeding, compare machine quilting for beginners. Hand and machine methods can both finish a quilt; choose the one you enjoy practicing and can control.
Finish the thread and the quilt edge
Secure the end with the method tested on the sample, hiding the tail inside the sandwich where appropriate. Check that the last stitch does not loosen when the fabric is handled.
Work through the full quilting plan, keeping within the batting's spacing limit. Remove temporary basting as the chosen method directs. Inspect both faces before trimming the perimeter.
Then follow how to bind a quilt to close the raw edge. For a machine-pieced top, a beginner quilting machine can still handle construction while you reserve the layered stitches for handwork.
Verdict on hand quilting
Hand quilting begins with a comfortable sample, suitable tools and a simple line plan. Catch every layer and keep the thread relaxed enough for the fabric to stay flat. Consistent practice on a small piece gives you a sound path to a larger quilt.
FAQ
Do I need to hand piece the top before hand quilting?
No. You can machine piece the top and hand quilt the layers afterward. The two stages do different jobs. Start with a small basted sandwich to test your hand needle, thread and how easily they pass through the batting.
How close together should hand quilting lines be?
Follow the specific batting's maximum quilting-distance directions. That spacing is different from the size of each running stitch. Plan enough lines to hold the batting across the whole quilt, including borders and large plain patches.
Why are some hand quilting stitches missing on the back?
The needle has not caught the backing on those bites. Take one stitch at a time on a sample and check the reverse often. Adjust the needle angle before trying to load several stitches in one movement.