
Quilting
How to Bind a Quilt with a Hand-Finished Edge
The short answer
Practice a corner and end join on a layered sample, then attach the binding to the front and hand stitch the fold to the back.
Last updated October 2026
What's covered8
- How to bind a quilt for beginners: make a corner sample
- Start on a straight side, away from a corner
- Turn the first corner with two folds
- Join the final tails on a flat surface
- Roll the binding to the back
- Make small stitches that stay in the backing
- Inspect the whole edge before washing
- Verdict on how to bind a quilt
For a hand-finished quilt edge, sew the binding strip to the front by machine, then wrap it to the back and secure the fold with small hand stitches. Start on a practice sandwich to learn how to bind a quilt. Check for an even wrap, flat corners and stitches that catch the backing without passing through to the front.
This lesson follows that front-first, hand-finished route from the first seam to the last knot. The quilting guide places binding after quilting and trimming. Use binding a quilt when you need strip counts and yardage before starting.
How to bind a quilt for beginners: make a corner sample
Make a small square sandwich from the same fabrics and batting as the quilt. Quilt through the layers, then trim the edges square. It gives you corners to practice and the same thickness the real binding must wrap.
Prepare a short double-fold strip. Our sample uses a 2 1/2-inch cut width, folded in half lengthwise with wrong sides together, and a 1/4-inch first seam. Those are the measurements used in this lesson. Test them on your sandwich before committing to the full quilt.
Christa Quilts' hand-finished binding tutorial shows the same broad sequence: prepare a continuous strip, machine attach it, then secure the fold by hand. Keep a needle, matching thread, thimble and clips nearby so you can complete the sample.
Wrap the test strip around the sewn edge. The fold should cover the first seam on the back without needing a hard pull. If it barely reaches, adjust the strip width or first seam on the sample. Do this before you cut the quilt's full binding.
Start on a straight side, away from a corner
Lay the quilt front up. Align the binding's two raw edges with the trimmed quilt edge. Leave an unsewn starting tail long enough for your chosen end join, and begin partway along a straight side.
Starting away from a corner gives you a flat area for joining the ends later. Before sewing, lay the strip loosely around the perimeter. Shift the starting point if one of its seams would sit right on a quilt corner.
Sew with the tested 1/4-inch allowance. Rest the quilt on the table so its weight does not drag at the needle. Keep the binding relaxed as it feeds. You are joining equal edges, not stretching a band around the quilt.
Stop after a short section and fold it to the back. Check that the seam is secure and the fold reaches beyond it. This early check catches a fit problem while only a small section needs unpicking.
Turn the first corner with two folds
Stop the first seam 1/4 inch before the corner, matching the seam allowance used here. Secure the seam and remove the quilt from under the foot. Fold the loose binding upward and away from the next side, making a diagonal fold at the corner.
Fold the strip back down along the next side. Its raw edges should align with the next quilt edge, while a horizontal fold sits level with the top edge you just finished. Hold the folds in place and begin sewing the next side with the same allowance.
Repeat at each corner. Do not pull the strip tight across the fold. It needs enough fabric to turn over the corner later. A fold that looks neat while flat can still be too tight once it wraps around the quilt's thickness.
On the practice piece, turn the binding to the back now and inspect the result. If the corner has a gap, unfold it and compare the two folds. Repeat the corner until you can see why the fabric forms a miter.
Join the final tails on a flat surface
Leave a gap before reaching the starting seam. Spread this part of the quilt flat and arrange both tails along the raw edge. Keep the strip relaxed, with enough room to handle the join.
For a diagonal join, the overlap of the trimmed tails equals the original cut strip width. In this lesson that is 2 1/2 inches. Measure the overlap before trimming, then open the folds and place the tails right sides together at right angles.
Pin the proposed diagonal seam and test it before stitching. The joined strip should lie flat against the quilt edge without a twist. Sew the join, open it and check again before cutting away the excess.
Refold the strip and sew the remaining attachment gap. If the strip bows or pulls at this point, inspect the join length. Do not force the last section to fit by stretching the quilt or hiding a pleat.
Roll the binding to the back
Turn the folded edge around the trimmed layers. Work along a short section and clip it just beyond the first seam. The binding should feel filled by the quilt edge, rather than hang as an empty flap.
At a corner, fold one side down, then fold the next side over it to form a neat diagonal. Check the front as well as the back. The two sides should meet without exposing batting or leaving a hole at the tip.
Choose the direction of the back corner fold and use it consistently. You may need to adjust the layers with your fingers before clipping. Small changes here are easier than trying to flatten a bulky corner after it has been stitched shut.
Keep the edge supported while you work. A quilt hanging from one small clipped section puts weight on the fold. Rest most of it on your lap or table and move only the section you are stitching.
Make small stitches that stay in the backing
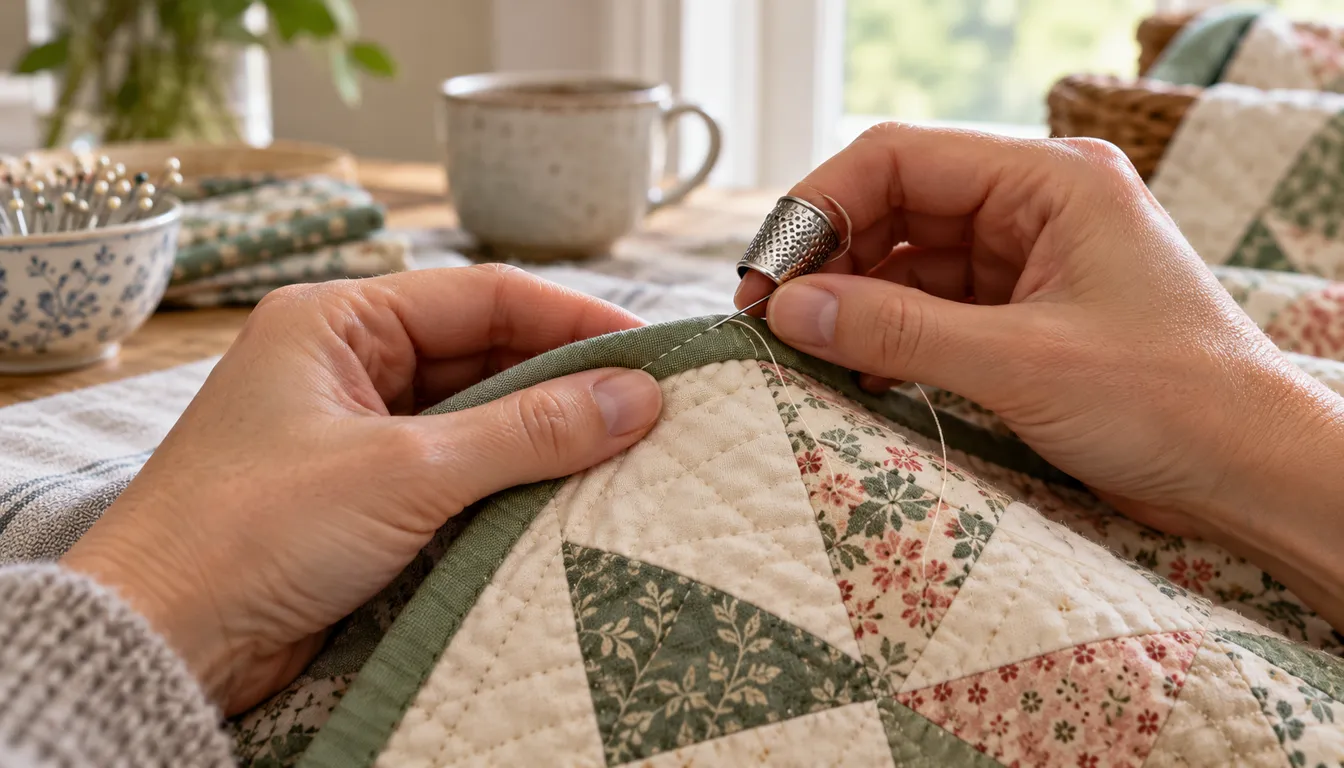
Use a thread that blends with the binding. Secure it under the fold so the start is unseen. Take a small bite of backing close to the fold, then a small bite inside the folded binding edge. Pull the thread snug without gathering the fabric.
The needle should catch the backing, not travel through the full quilt sandwich. Check the front after the first few stitches. If dots of thread appear there, take a shallower bite on the next section.
Use a length of thread you can pull through comfortably; a long length can tangle and fray. A thimble helps push the needle through the layers. If the thread is hard to pull through the eye, test a needle with a larger eye on your sample.
At each corner, secure the folded miter with small stitches, then continue down the next side. Keep checking the fold against the attachment seam. If it slips away from that seam, reclip the next section before sewing it.
Inspect the whole edge before washing
Run your fingers around both sides. Look for loose folds, open corners, long exposed stitches and places where the backing has been caught into a tuck. Fix a missed section now while the thread color and tools are still at hand.
Remove every clip and loose thread. Follow the fabric and batting care directions when washing the finished quilt. Keep the binding sample with your records if you want to use the same width and seam again.
If hand finishing feels too slow for your next everyday quilt, compare machine binding. It changes the visible stitching and the order of attachment, so practice that route as its own method.
Verdict on how to bind a quilt
Learning how to bind a quilt is easier when each stage has a check: fit the strip, form the corners, test the end join and inspect the hand stitches. Finish a small sample first, then repeat the same measurements on the quilt.
FAQ
Which side do I attach binding to for hand finishing?
For the method here, attach it to the front by machine. Wrap the folded edge to the back and hand stitch it there. Test the strip width on the real layer combination so the fold covers the attachment seam comfortably.
Why does my hand stitch show on the quilt front?
The needle may be passing through the whole sandwich instead of taking a shallow bite of backing. Inspect the front after a short section. Adjust the bite on a sample before continuing, keeping the binding fold over the first seam.
How do I keep the last binding join from twisting?
Pin the two tails together on the diagonal and check that the strip lies flat along the quilt edge, with the right side facing the same way all along it. Sew the diagonal seam, lay the strip on the edge to check it again, then trim the extra fabric and press the seam open. Finish by sewing the last section of binding to the quilt.