
Quilting
Machine Applique Tips: Edges, Corners and Curves (2026)
The short answer
Fuse the shapes with a sewable web, support the background and test the edge stitch on scraps. Stop with the needle down before each small pivot.
Last updated October 2026
What's covered9
- Machine applique tips: prepare fusible shapes
- Machine applique tips for stabilizer and setup
- Choose zigzag, blanket stitch or straight stitch
- Turn corners and curves with the needle down
- Sew a practice motif before your pillow
- Troubleshoot puckers and missed edges
- Applique sources and limits
- Machine applique questions
- Verdict on stitched applique edges
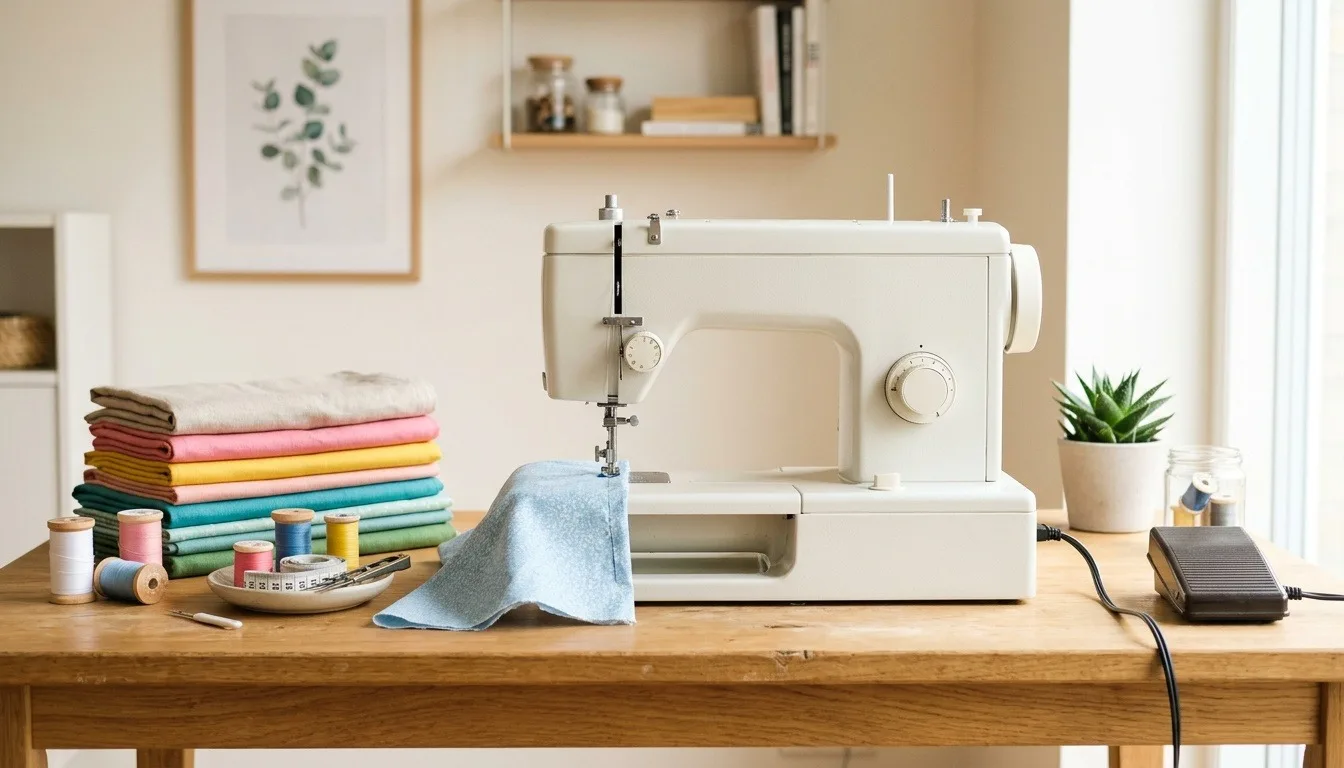
A fused fabric shape can look neat before sewing, then pucker as the stitches pull at its edge. These machine applique tips start with the layers under the needle. You'll make a scrap sample, choose an edge stitch and learn where to stop before turning a corner. The sewing setup above is illustrative, not a tested appliqué sample.
Use a fusible web made for sewing, then support the background with stabilizer. Test your chosen stitch on the same layers as the project. For zigzag, most of the stitch sits on the shape and the outer swing just reaches the background. Pivot with the needle down, lifting the foot before each small turn. Check the back as well as the front.
Machine applique tips: prepare fusible shapes
Fusible web is a thin layer of heat-activated glue that holds a shape on fabric. Choose a product whose label permits stitching through it. A no-sew adhesive is not a safe substitute just because it holds firmly.
Start with a simple shape and cotton scraps. Press the fabric flat and check how it reacts to the heat your web needs. Keep the web's packet beside the iron: heat, pressing time and steam instructions differ between products.
Utah State University's machine appliqué instructions describe tracing onto the paper side, fusing to the wrong side of the fabric, then cutting on the traced line. Follow your product's directions for each pressing step. More heat is not always better; excess pressing can stop some webs from sticking well.
Reverse letters and other shapes that must face a set direction. The paper backing goes on the wrong side, so the design flips when you turn the fabric right side up. Label small pieces on their paper to keep the order clear.
Peel the backing off when the instructions say to do so. Arrange the pieces on the background fabric before the final fuse. If one shape sits behind another, place it first so its hidden edge stays under the top piece. Keep the iron off exposed glue.
Machine applique tips for stabilizer and setup
Stabilizer supports the background fabric while the needle forms the stitches. Place it against the wrong side of the background, beneath the fabric layers, before stitching. It helps stop the cloth drawing into a ridge, often called tunneling. Fusible web holds the shape; it does not always give the background enough support on its own.
The BERNINA machine appliqué ebook describes tear-away, cut-away and water-soluble supports. Tear-away lets you remove excess after sewing. Cut-away leaves support behind the shape. Water-soluble support needs a project that can tolerate its removal method.
Test the fabric and stabilizer together. Use a new needle suited to the cloth and thread, following your machine manual. A needle size recommended for thick thread on one project may be wrong for fine cotton on another.
Fit a compatible open-toe or appliqué presser foot if you have one. You need a clear view of the edge and enough room for the selected stitch. With the machine off, turn the handwheel as your manual directs to check that the needle clears the foot across its full swing.
Thread the upper path and bobbin correctly. Begin with the manual's normal tension, then sew a scrap before changing it. If your machine has needle-down and speed controls, use them to make stopping easier. Keep the fabric supported on the table.
Choose zigzag, blanket stitch or straight stitch
Pick the finish before setting stitch width or stitch length. No single pair of numbers suits every set of fabric layers and thread. Sew a short row on the sample, then adjust one setting at a time.
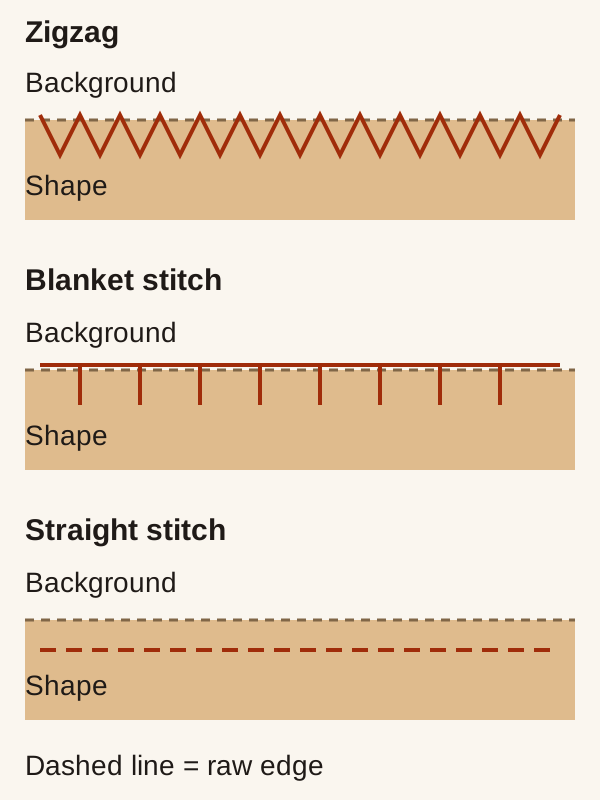
Zigzag: Place most of the stitch on the appliqué fabric. The outer swing should just land on the background beside the cut edge. If both swings land inside the shape, loose threads can poke out beyond the stitching. If both land outside it, the stitch won't hold the shape properly.
Blanket stitch: This has a line along the edge and small bites that reach into the shape. Align the edge so those bites catch the appliqué. Watch a full stitch cycle on a scrap; some machines take extra forward or backward steps. That cycle affects where you stop at a corner.
Satin stitch: A closely spaced zigzag can cover the edge more fully. It also puts more thread into a small area, making support and tension checks useful. Start with an open zigzag if dense stitching makes it hard to see what is going wrong.
Straight stitch: A line inside a raw edge can hold the shape while leaving fabric outside the seam to fray. Choose it when that softer edge is part of the design. It does not enclose the cut edge like zigzag or satin stitching.
Turn corners and curves with the needle down
Stop before pulling the fabric into a new direction. Leave the needle in the cloth, lift the presser foot and pivot a little. Lower the foot before sewing again. Turning with the foot pressing down can drag the layers and slant the stitches.
For the zigzag arrangement in the diagram, the shape lies to the left of the stitch path. At an outside corner, stop on the outer swing, with the needle in the background just beyond the shape. Lift the foot, turn toward the next edge and lower it. The next swing comes back onto the shape.
An inside corner turns the other way. Continue past the corner by about one stitch width, then stop on the inner swing in the appliqué fabric. That extra distance lets the next stitch cover the turn instead of leaving a gap. Pivot with the needle holding the layers. On a sharp point, check where the next needle drop will land before pressing the pedal.
Use the same inside-or-outside distinction on curves. An outside curve bows out from the shape; an inside curve cuts into it. Pivot on the outer swing for outside curves and the inner swing for inside curves. Use small turns rather than one large turn. Tight curves need short advances so the stitching can follow the outline.
Those instructions assume the shape is on the left. If you mirror the stitch or sew with the shape on the right, use the actual inside and outside positions rather than memorizing left and right. Test that arrangement before moving to the project.
Blanket stitch needs an extra check: stop at the right part of its cycle so the next bite catches the new edge. Turn the handwheel slowly when needed. For an intricate point that won't turn neatly, practice the sequence on a larger scrap version first.
Sew a practice motif before your pillow
Draw a circle, a square and a simple heart on scrap paper. These are practice shapes, so their size can suit the scraps you have. Avoid tiny shapes at first; you need room to see each needle drop.
Trace the shapes onto your sewable web and fuse them to scraps. Put them on spare background fabric with the support you plan to use. Keep this sample separate from the pillow front so you can change settings without leaving holes in the finished piece.
Sew the square to test straight runs and outside corners. Move to the circle for small pivots. Use the heart to practice its inward notch and outward point. Stop after each shape to inspect both faces.
Note the stitch type and its settings beside the sample. Keep a note of the needle and thread too, along with the support. These notes apply to that set of layers, not every future project. If you change the fabric or thread, sew another sample before continuing.
Troubleshoot puckers and missed edges
Puckers around the shape: Check support and thread tension on a scrap. Dense stitches can pull at a soft background. Try a less dense stitch or a better suited stabilizer, then compare the result before changing something else.
Loose threads beyond zigzag: Look at the outer needle drop. Move the fabric so the stitch reaches the edge instead of sitting too far inside. Do not widen the stitch without checking foot clearance again.
Slanted stitches on curves: Stop feeding the cloth sideways. Lift the foot for small needle-down pivots and let the feed dogs move the fabric between turns. Keep bulky fabric from hanging off the table.
Skipped stitches or thread breaks: Stop and check the needle and thread path. Check foot clearance too. Replace a bent or damaged needle before trying to tune tension. The skipped-stitch guide gives a step-by-step check.
A gap at a corner: Check whether you pivoted too early, on the wrong swing or before the blanket stitch completed its bite. Unpick the short failed section, then try the turn on a scrap. Adding dense stitches over a mistake can make the corner stiff.
Applique sources and limits
These instructions draw on Utah State University and BERNINA's technique guides linked above. The inside-point method also follows AllPeopleQuilt's machine appliqué tips. They describe a fused, stitched edge on a regular sewing machine, not programmed hoop embroidery. Use your own machine and adhesive instructions for product-specific settings. The diagram is an original teaching illustration; no physical stitch-out or product test is claimed.
For the next stage, see machine quilting for beginners. The quilting guide covers other ways to build and finish a project.
Machine applique questions
Can I applique with a regular sewing machine?
Yes, a regular machine can sew appliqué with a suitable straight or zigzag stitch. You guide the fabric around the shape yourself. Blanket stitch is another option when the machine provides it. Check compatible feet and needle clearance in the manual before selecting a wide stitch.
Do I need stabilizer for machine applique?
Test it with your actual layers. Stabilizer can stop the background pulling into puckers under dense stitching. Choose the type to suit your fabric and stitch, with a removal method the project can tolerate. A firm scrap sample may need less support than a soft fabric or a closely packed satin edge.
Must I stitch over fusible web?
Follow the label for your product. For this method, choose sewable fusible web and stitch the shapes in place after fusing. The web holds them while you sew. A no-sew product has a different purpose, and its instructions may warn against putting a needle through the adhesive.
Where should the needle stop at a corner?
For zigzag with the shape to the left, stop on the outside swing at an outer corner. Use the inside swing at an inner corner. Keep the needle down while lifting the foot to pivot. Check the next needle drop by hand, especially near a sharp point or a blanket-stitch turn.
Verdict on stitched applique edges
The most useful machine applique tips come back to a small scrap sample. Prepare the shape with sewable web, give the background support and watch where each needle drop lands. Once the edge lies flat and the turns look right, use that same setup on your pillow or quilt block. Keep the sample and notes for the next project.